Coconut Flour Fudge Brownies (Grain-Free Goodness!)

IMG_9559[1]

It’s no secret…I am definitely in love with chocolate, particularly chocolate brownies. If I am honest, I have something on hand every week! πŸ™‚ Am I addicted? Probably. πŸ™‚ These brownies have been my “go to” dessert for quite a while; they also have been successful at satisfying the sweet tooth of family and friends. I am incredibly grateful to Erica from the Comfy Belly for this delicious recipe. I did alter the amount of coconut flour, but other than that, this is Erica’s recipe. πŸ™‚ Be sure to check out her blog for more great dishes! πŸ™‚

Ingredients:
1/4 cup minus 1/2 tsp. coconut flour (Do not pack this. Too much coconut flour will alter the texture of your brownies.)
3/4 cup unsweetened cocoa powder (You can also use cacao powder.)
1/2 teaspoon sea salt
4 organic eggs (This is important.)
3/4 cup maple syrup (Grade B preferred)
2 teaspoons pure vanilla extract
1/3 cup melted coconut oil (If dairy is tolerated, Kerrygold butter tastes great in place of the coconut oil! I find mine at Trader Joe’s. Sometimes Costco will carry this as well.)

Directions:
1. Preheat the oven to 350 and grease an 8×8 pan with coconut oil.
2. In a large mixing bowl, whisk the dry ingredients together. Set aside.
3. In a smaller bowl, combine all of the wet ingredients, except for the coconut oil (or butter). Add the wet ingredients (except the coconut oil/butter) to the dry ingredients. Using a handheld mixer, combine the wet and dry ingredients until well incorporated. Add the 1/3 cup oil or butter and process again until incorporated.
4. Let the batter set for 5 minutes, and then proceed to process once more for 30 seconds with the handheld mixer.
5. Pour the batter into the prepared pan, and bake for 20-25 minutes, or until the toothpick inserted comes out clean. (I always under bake mine a little and take them out at 20 minutes because I prefer them that way; it is a matter of your taste preference.)
6. Optional but absolutely delicious: Poke holes into the top of the brownies and frost with Erica’s delicious ganache! Find the recipe here.
7. Let cool slightly and enjoy! πŸ™‚

*This page contains affiliate links.
*Brownie and ganache recipe from Comfy Belly.

Nutritious Chocolate Mint Smoothie (Paleo Style)

IMG_9617[1]

I know, I know…I am a couple days late with this one! I had planned to have this post ready for St. Patty’s Day, but unfortunately (or not:)), I drank this delightful smoothie before I gave myself a moment to take a picture. So, I just promised myself another smoothie the next day…and the next. πŸ™‚ Yes, I have had three of these since March 17th, but I am not ashamed! There is no need to feel guilty for this one, because it is full of nutritious ingredients, paleo, and even more, it is absolutely satisfying. Go ahead! Make a few for yourself this week. πŸ™‚ Enjoy!

Ingredients:
1/2 avocado, peeled, cut into chunks, and placed in the freezer for an hour (Please do not skip this step! This is a smoothie “game changer” in regards to texture!)
1 frozen banana, cut into chunks
*1/2-3/4 cup coconut milk (Try this homemade recipe!) If you do not make your own, it is important to purchase a brand which does not contain carrageenan.
1-2 mejool dates
1 1/2 teaspoons pure vanilla extract, alcohol free (I purchase mine from Trader Joe’s.)
1/8 teaspoon pure peppermint extract (This is the brand I recommend, as it does not contain alcohol.)
1-2 tablespoons unsweetened cocoa powder
1/2 cup ice
Optional add in: Great Lakes Collagen Hydrolysate (This is a great protein source and super for gut health. Make sure to purchase the green can, not the red one.)

Directions:
Place all the ingredients in a blender, and process until smooth. A high-speed blender works great for this, but if you do not have one, a normal blender will work just fine. It just may take a little more work to get it all processed. πŸ™‚ Pour your delicious treat into a large glass. If desired, top with one of these brownies!

*Start with a 1/2 cup of milk. You may need to add a little more milk (or water) to assist in blending. Add a little at a time, so as to not make it too runny. You want your smoothie to have an “ice cream-like” consistency. πŸ™‚

*This post contains affiliate links. Thanks for your support!

Chocolate Chip Coconut Bars (Grain-free, Nut-Free, Delicious!)

IMG_9564[1]

I recently discovered this recipe from Living Healthy With Chocolate and decided to give them a whirl. Why not, right?! I had all the ingredients in my pantry, so I proceeded with excitement. The recipe that I have posted here contains a few modifications, just because I wanted to add a little of my own creative ideas, but I can guarantee you that the original recipe is absolutely delicious too!! πŸ™‚ Make sure to check out the rest of the Living Healthy With Chocolate blog while you are at it; there are so many delightful treats featured. Enjoy!

Ingredients:
1 cup+2 tablespoons unsweetened, shredded coconut
1 cup coconut butter, (measured when melted)
5 tablespoons coconut oil or grass-fed butter, melted (measured when melted) Unsalted Kerrygold is a great option for a grass-fed butter in this recipe.
pinch of sea salt
1 teaspoon vanilla extract
1 1/2 tablespoons maple syrup (Grade B preferred)
1/2 cup Enjoy Life dark chocolate chips

Directions:
Grease an 8×8 glass pan and line it with parchment paper. (I have found that greasing the pan first is an easier way to get the parchment paper to lay more flat.) Set the pan aside.

In a small saucepan, melt the coconut butter on the lowest setting. When melting coconut butter, stir frequently to avoid burning. Set aside.

In a medium mixing bowl, combine the coconut, coconut oil (or grass-fed butter), salt, vanilla, and maple syrup. Stir gently with a spatula. Pour in the melted coconut butter, and combine. Gently stir in the chocolate chips. Some will melt a little; that is okay! πŸ™‚ Your batter will look runny. Do not worry! It will solidify when you place it in the freezer or fridge.

Place the bars in the fridge until solidified and cooled. This will take approximately 20 minutes. You can always place them in the freezer if you are impatient like me, but remember that they will get rock hard pretty quickly! πŸ™‚

*Store the bars in an airtight container in the fridge. Enjoy often and without an ounce of guilt!

Optional add-ins: In addition to the ingredients listed, you can also add 2 tablespoons of a nut butter of your choice. Another great option is to add a scoop of the Dynamic Greens Espresso powder for an extra boost of nutrients! πŸ™‚ I actually did a batch where I added both the nut butter and the Dynamic Greens along with the rest of the recipe. Not only were they delightful, but they were kid-approved as well!!

*Note: These do not have the best taste when they have been sitting at room temperature for a while. They taste best chilled. πŸ™‚ (I did have to let mine sit out for a bit before giving a sample to my 3 year old son so as to make for easier chewing for a wee-little one. :))

Original recipe found here.

This post contains affiliate links.

Coconut Peanut Butter Stuffed Date Truffles

IMG_9518[1]

My love for chocolate, peanut butter, and dates inspired me to give this recipe a whirl, and all I can say is, “Wowza!” These are AMAZING. I am not even kidding; you need to have made these yesterday. Not only are they delicious, but they are an excellent choice for a treat. Dates are packed with nutrients: fiber, potassium, iron, B vitamins, and vitamins A and K, just to name a few. (See more on the health benefits of dates on Dr. Mercola’s site. )

Before I go any further and give you the directions for these date truffles, I do have to thank Sylvie, from Gourmande in the Kitchen, who is the master behind the original recipe. If you want her original recipe without my modifications, head on over and check out her creation (She has named these treats Chocolate Covered Coconut Dates). Plus, she has some other wonderful recipe inspirations as well! πŸ™‚

Without further ado, here is your tasty treat! πŸ™‚

Ingredients for the Stuffed Dates:
1/2 cup unsweetened shredded coconut (Note: If your batter seems a little runny after the stuffing ingredients are mixed, add 1-2 extra tablespoons of shredded coconut.)
2 tablespoons melted coconut oil
2 tablespoons maple syrup, Grade B preferred
4 tablespoons organic, creamy peanut butter (You can also use sunflower seed butter or almond butter as well!)
Pinch of sea salt or pink Himalayan salt
1/8 teaspoon vanilla extract (Trader Joe’s sells one that is both alcohol free.)
About 20 large, soft Medjool dates (I actually have found a great deal on dates at Costco!)

Ingredients for Chocolate Dip:
1/2 cup melted coconut oil
1/2 cup cocoa powder
4 tablespoons maple syrup, Grade B preferred
1/4 teaspoon vanilla extract
Pinch of sea salt or pink Himalayan salt

Directions:
*In a large mixing bowl, combine the ingredients for the date “stuffing” (mixing by hand). You can also put all of the ingredients in a food processor for a smoother filling.
*Cut each date in half lengthwise one way, and take out the pit.
*Fill each date with the peanut butter stuffing.
*Chill the dates in the freezer. 20 minutes is a good amount of time.
*While the dates are chilling, make the chocolate dip. Place the melted coconut oil in a medium-sized bowl. Add in the remaining ingredients and mix with a whisk.
*Remove the dates from the freezer. Using a toothpick to hold each date, dip one at a time in the chocolate until fully covered. Place them on a parchment lined cookie sheet. If you desire, sprinkle the dates with chopped nuts, coconut, etc., right after dipping so that your sprinkles set with the chocolate. Place back in the freezer until the chocolate sets. Enjoy!! Store in an airtight container in the fridge or freezer.

*This page contains affiliate links.
*This recipe has been adapted from Gourmande in the Kitchen.

Guest Post by Gorilly Goods: An Interview with a Vibrant, Local Organic Food Manufacturer

It is my pleasure to introduce to you today, Chris, the Co-Founder of the delicious, crunchy snacks, Gorilly Goods. Not only are they delicious, but they are snacks which you can feel good about as they are packed full of nutrition. Enjoy learning more about Gorilly Goods, and don’t forget to take advantage of the February PROMO at the end of this post! Give the Gorilly Goods a try for yourself!
Gorilly Goods 1
Chris: We met LeNay and her sweet young boys while visiting a couple of stores with our Gorilly Goods products. We are delighted and honored to be able to introduce ourselves through LeNay’s beautiful Avocado Mommy blog.

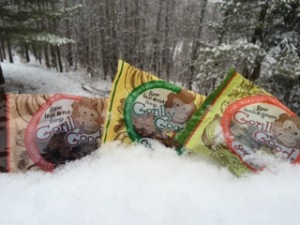
Avocado Mommy: What are Gorilly Goods?
Chris: Gorilly Goods are crunchy, organic snack β€œthings”. They are packages of tasty goodness that are delicious with your morning coffee or tea, are excellent to grab for a snack β€œon the go”, and are great for long drives in the car to grandma’s house. In addition, these snacks are ideal for refueling on the hiking trail or after your workout. Finally, they are excellent for kids! Pack them in our kids’ lunch along with a few extra to share with their friends! There are three flavors of which to choose from: The β€œOriginal” and the β€œChocolate” which are sweet and the β€œSavory” which are made with seeds and greens. They are handmade in Jackson, WI, in a small family business owned by people who care about others and live like it’s heaven on earth.
Gorilly Goods 5
Avocado Mommy: Wow! My mouth is watering already. What are some other aspects that make this product so exceptional for my family?
Chris: Gorilly Goods represent the next generation of nutrition snacking: 100% organic, gluten-free, raw, non-gmo, vegan, and certifiably delicious. They represent cleaner oceans,
fresher air, more fertile soil, sustainability, forest life, healthy dancing children, brilliant
sunsets, and a connection to nature. These are the β€œthings” of Gorilly Goods snacks.

Avocado Mommy: What is the background/inspiration behind the company?
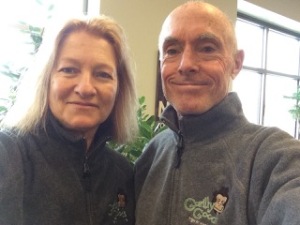
Chris: My husband, Stephen, and I are a conscientious couple that have spent our last
25 years following a passion. Much of the passion has been connected to food, how
food relates to life on our planet, how food impacts the well-being of animals and
humans, how it affects our outlook on life, and how our food choices matter in the
scheme of our world. In 1999, Stephen and I chose to live a raw-food lifestyle
which we embraced, with much study, for several years. During this time, we
developed the Raw Foods Foundation in St Louis, MO. Classes were taught, raw
retreats were held, and many delicious recipes were created. The best of these recipes are
now being produced and introduced to the world through our products, Gorilly Goods.
Gorilly Goods 2
Avocado Mommy: Tell us a little more about the production of this product.
Chris: Everything we use in our kitchen is certified organic – that’s important to us. Our first
product to be introduced was the Original Fruit and Nut Things. It’s made mostly of
bananas (fair trade from Ecuador), with California raisins, Texas pecans, Vietnamese
cashews, California walnuts, Philippine coconut as well as coconut nectar, and some
sea salt. The same ingredients are in the Chocolate Fruit and Nut Things variety, but
we coat the Original pieces with an un-roasted, certified organic cacao bean chocolate,
sweetened with coconut palm sugar. It’s all vegan, non-gmo, and created on the tropical
side of heaven – imported from Bali. This Balinese chocolate is 70% dark and full of all
the good antioxidants and nutrients that dark chocolate is known for! Besides fair trade,
it’s certified organic and undeniably, an excellent choice of chocolate. The Savory
variety is made with mighty pumpkin seeds and the cruciferous king: kale (locally
grown from Full Harvest Farm, when available). The seeds and kale are
seasoned with organic nutritional yeast from Germany (info on our blog), gluten-free
organic tamari, and tasty seasonings.
Gorilly Goods 3
Avocado Mommy: I have these on my grocery list! Can you share any other thoughts as to why your products are special?
Chris: (As my mom would say…they are…)
β€’ delicious
β€’ nutritious
β€’ make you feel ambitious πŸ™‚
β€’ seriously, they are just good….good tasting, good for you, good for the earth, just
plain old good

We can’t wait for you to try our delicious products! Plus, we have a great promotion for all Avocado Mommy readers:

Rejoice! Use coupon code β€œavocado” at checkout. You will get you 25% off suggested retail price of any online orders. The coupon is good through February 28th, 2015.

Thank you for reading! Thank you for checking out our products. Thank you for caring
about life. You can read more about us at http://www.gorillygoods.com
******************************************************************************************************
*This post contains affiliate links.

Honey Sweetened Cupcakes with Buttercream

IMG_9483[1]

Mmmmm….cupcakes. Let’s admit it. Most of us are huge fans of this tasty treat. Yet, many times, cupcakes are filled with loads of sugar as well as gluten. Where do we find a tasty substitute that still tastes like a cupcake? Well, let me tell you that I have a delicious cupcake recipe to share with you today from another “nutrition-minded” blogger. I recently discovered this dessert from Erica over at her blog, Comfy Belly. I’d encourage you to check out her website as she has fantastic ideas! In the meantime, whip up a batch of these, and enjoy them with no guilt. πŸ™‚ I have followed her cupcake recipe exactly because it is so wonderful just the way it is! The only slight change I made was to omit the seeds from the vanilla bean (as I did not have this on hand) and instead, I increased the vanilla extract in the recipe slightly.

Cupcakes:
Ingredients:
1/2 cup coconut flour (Do not pack the coconut flour in the measuring cup.)
1/4 teaspoon baking soda
1/4 teaspoon sea salt
4 large eggs
1/3 cup coconut oil, melted
*1/2 cup honey
2 tablespoons coconut milk or other milk
1 tablespoon + 1 tsp. vanilla extract

Directions:
*Preheat the oven to 350. Line a muffin tin with muffin liners and set aside. (This recipe makes approx. 8 cupcakes.)
*In a medium-sized mixing bowl, combine the dry ingredients. In a separate bowl, add the eggs, melted oil, honey, milk, and vanilla extract. Using an electric mixer, mix the wet ingredients. Add the wet ingredients to the dry ones, and combine them using the electric mixer until they are well blended. Let the batter set for 3 minutes, and then mix once more for 15 seconds.
*Fill the muffin liners 3/4 of the way full, and pop the cupcakes in the oven for approximately 20 minutes. Keep an eye on them toward the end so that they don’t get too dark. The cupcakes are done when a toothpick inserted comes out clean.
*Cool and frost with the buttercream recipe below. I followed Erica’s buttercream recipe, but I decreased the honey by 1 tablespoon and I used Tropical Traditions Palm Shortening instead of Spectrum’s Vegetable Shortening.

Buttercream Frosting:
4 tablespoons organic butter at room temp.
4 tablespoons palm shortening
*4 tablespoons honey
1 teaspoon vanilla extract

*With an electric mixer, blend the buttercream ingredients until they are smooth. Frost your amazing cupcakes! πŸ™‚

*Note: If you can get your hands on some local raw honey, it is well worth it for this recipe. Raw honey has a flavor that is superior to regular pasteurized honey. πŸ™‚

*This page contains affiliate links.

*Find the original cupcake recipe here and the frosting recipe here.

Protein Packed Peanut Butter Cups

IMG_9315[1]

This past week, my precious sister was in town to visit for the Thanksgiving holiday, and boy, do I miss her sweet presence, as well as that of her family, now that she has traveled back home to her place. Amongst the many things that we enjoy doing together, one of them is eating chocolate, and we definitely made sure that we tried a few good treats from the kitchen while she was here. One favorite that came as a result of her stay here was these beautiful protein packed peanut butter cups! They are tasty, yet filled with an extra dose of healthy fats and protein. You can feel good about placing these on your holiday tray this Christmas. πŸ™‚

Protein Packed Peanut Butter Cups
Ingredients:
2 tablespoons coconut oil
2 tablespoons organic crunchy peanut butter
*2-3 tablespoons high quality protein powder ( I would suggest this protein powder)
1/2 teaspoon maple syrup (Grade B preferred)
2 ounces dark chocolate + 1 tablespoon coconut oil for melting

Directions:
Melt the the coconut oil, peanut butter, and maple syrup in a sauce pan on low. Stir frequently. Remove the pan from heat and stir in the protein powder. Fill approximately 10 mini muffin liners with the peanut butter mixture. Each liner should be half full. Place in the freezer to set for 10 minutes while you melt the chocolate topping. In a small sauce pan, melt together the chocolate and the coconut oil on low, stirring constantly, making sure not to burn. Remove the peanut butter cups from the freezer and pour chocolate on top of each cup. Place back in the freezer for 10 minutes. Remove and enjoy! πŸ™‚ Store in an airtight container in the refrigerator. πŸ™‚

*Thank you to my lovely sister for this great recipe. πŸ™‚ It will be consumed often. πŸ™‚

*Note about whey protein: Above all, I still recommend getting the majority of your protein from high quality grass-fed meat. This is still the most natural way to consume protein and the most easy for one’s body to recognize. If you are still wanting to supplement with a whey protein, then there is some information worth noting.

I do not recommend using several whey proteins on the market as many of them have been denatured, filled with artificial sweeteners, and are very hard on one’s gut. Dr. Axe gives a well written response to what to look for in whey proteins as well as the risks of using one that is not in its natural form:
“Unfortunately, not all whey protein is created equal. Most of the protein powders on the market today have undergone acid treatments, been injected with steroids and hormones like rBGH, contain artificial sweeteners and are denatured.

Consuming denatured protein powder is hard on your digestive tract and can lead to a condition called leaky gut, which can then cause inflammation and autoimmune issues.

 So, I urge you to stay away from all processed non-organic protein powders because they will likely do you more harm than good. 

Instead look for organic and Grassfed whey proteins. 


When buying whey protein, make sure you’re getting both β€œorganic” and β€œgrass-fed”. 

Along with these, here are 7 others important things you’ll want to consider:

Cold Processed, NOT heat processed
Only ORGANIC so it’s free of pesticides, hormones and heavy metals
Grass-fed, NOT grain-fed, which is important for healthy fat ratios of CLA
High Bio-Availability, so better option than rice or vegan protein powders
Sweetened naturally, No artificial sweeteners
Easy to Digest, No protein isolates which harm the digestive tract, concentrates are less processed.
Low Carb, No fructose or other processed sugars
…”

*To read more about Dr. Axe, you can find his website here.

*This page contains affiliate links.

Chocolate Chip Pumpkin Muffins (Paleo Style:)

IMG_9283[1]

These muffins are absolutely divine. πŸ™‚ Yummy, moist, and full of chocolate, this delicious recipe is not only easy to whip up, but they are full of nutritious ingredients! I originally found these muffins from Juli over at PaleoOMG, and then I tweaked it slightly. I am giving you the recipe with my modifications, but feel free to head on over to the PaloOMG blog to check out the original recipe. πŸ™‚

Ingredients:
1/3 cup organic pumpkin puree
1/3 cup maple syrup (Grade B preferred)
1/4 cup melted coconut oil or grass-fed butter if dairy is tolerated
3 eggs, whisked
1 teaspoon vanilla extract
*ΒΌ cup coconut flour
1 teaspoon cinnamon
pinch of ground cloves
Β½ teaspoon baking soda
Β½ teaspoon baking powder
pinch of salt
1/3 cup Enjoy Life Mini Chocolate Chips

Directions:
Preheat the oven to 350. In a medium sized bowl, mix together the wet ingredients: pumpkin, maple syrup, coconut oil, eggs, and vanilla. In a separate bowl, mix together the dry ingredients. Add the dry ingredients to the wet ingredients, and mix together well. Add the chocolate chips and fold in with a spatula. Fill 8 muffin tins 2/3 of the way full, and bake in the oven for 30-35 minutes. Watch to see that the muffins are not getting too dark on the tops. If this begins to happen, just simply cover the muffins loosely with foil for the remainder of the baking time. πŸ™‚ When done, remove the muffins and cool completely. Enjoy with a glass of homemade coconut milk! πŸ™‚

*Note about coconut flour: Coconut flour can be tricky at times. Sometimes your batter will look more wet than other times. That is okay! Do not add more coconut flour to your recipe. This will change the texture of the final product.

*Disclosure: This page contains affiliate links.

Gluten-Free Caramel Corn (Without Corn Syrup!)

IMG_9270[1]

Every once in a while, a bowl of caramel corn sounds pretty delightful, doesn’t it? I definitely have had my cravings for it, that is for sure! πŸ™‚ Yet, the downside of most caramel corn recipes is that they call for corn syrup (corn starch that is broken down into glucose). Many corn syrups also add high fructose corn syrup, which definitely has it’s health risks. To avoid using this ingredient, I tried making the caramel corn with Lundberg’s Brown Rice Syrup, and was I pleased! The final product has a rich, addicting flavor, and there is NO corn syrup! πŸ™‚ Try this snack for your next movie night. You will probably be filling your popcorn bowl many times. πŸ™‚ Enjoy!

Ingredients:
15 cups popped plain popcorn (set aside in a large bowl)
1 1/2 cups packed organic brown sugar (I get mine from Trader Joe’s)
12 tablespoons organic butter, plus more for greasing the roasting pan. (My next mission is to try
replacing the butter for coconut oil!)
6 tablespoons of Lundberg’s Brown Rice Syruyp
1 teaspoon fine salt
1 teaspoon vanilla extract
1/2 teaspoon aluminum-free baking soda

Directions:
Preheat your oven to 250 degrees, and generously coat a roasting pan (You may need 2 roasting pans depending on the size of your pan). In a medium saucepan, add the butter, sugar, brown rice syrup, and salt. Heat over medium heat and stir fairly frequently with a spatula for five minutes, bringing to a boil. Turn the heat down to low and let it stay at a low boil for 3 more minutes, continuing to gently stir so that it doesn’t burn. At the end of the 3 minutes, remove the pan from the heat, and add the vanilla and baking soda. Whisk vigorously for 10 seconds. It will turn light in color and increase in volume. πŸ™‚ Immediately pour over the top of your popcorn. Toss the popcorn until it is evenly coated with the caramel mixture, and spread it onto the roasting pan, making a single layer. Bake for 30 to 40 minutes, tossing the popcorn every 15 minutes. Start checking for the corn to be done at 30 minutes. To check if the popcorn is done, remove a couple pieces from the roasting pan and let them set on the table for a short bit. Crunchy caramel corn is done. πŸ™‚ Cool the caramel corn on a piece of parchment paper, and then dig into the sweet goodness. πŸ™‚

*Optional: Try tossing the cooled caramel corn with chocolate chips, peanuts, peanut butter chips, or whatever your heart desires. πŸ™‚

*Disclosure: This page contains affiliate links.

Butter Melts

IMG_9229[1]

This recipe has me hooked on butter. πŸ™‚ They melt in your mouth and are a great treat to satisfy the sweet craving. I have discovered that my oldest son loves them! (My youngest one would probably enjoy these as well, but we are waiting for a few teeth to show up before he takes a bite into one of these butter patties. :)) They are simple to make,the prep work is very minimal, and they contain high quality fats. Try mixing in some spices like cinnamon to make a fall treat. πŸ™‚ Enjoy!

Butter Melts
1/4 cup coconut butter
1/4 cup Ghee (Clarified Butter)
1 tablespoon maple syrup (Grade B preferred) or raw honey

Directions:
In a small saucepan, melt the coconut butter and the Ghee on a low setting. Stir the mixture constantly until melted. Add the maple syrup and mix. Remove from the heat, and divide the mixture amongst 6 muffin liners in a muffin tin. Place the melts in the freezer until set! If there are any butter melts left, store them in the freezer in an airtight container. πŸ™‚